QUICK ANSWER
The right UV printer machine factory is not simply the supplier with the fastest brochure speed or the lowest machine price. It is the team that can match a defined application to a controlled machine configuration, run your files on your materials, document curing and adhesion, identify the exact unit tested, and support that unit after it reaches your floor. Before paying the balance, witness a meaningful production run. Keep the printed samples. Match the serial number to the nozzle check, inspection report, RIP license, electrical documents, spare-parts list, training plan, and packing photos.
Start with the work you need to sell: substrate, size, surface, color, finish, daily volume, shift pattern, destination, and local service expectations. Then make every candidate prove the same jobs under the same acceptance rules. That single change turns a vague factory search into a comparison that purchasing, production, finance, and maintenance can all understand.
What Buyers Should Take Away
- Define the application before naming a model. A machine for rigid signs, flexible film, cylindrical products, textured layers, or UV DTF transfers may require a very different platform.
- Treat photographs as the start of verification. Cabinet shape and visible media hardware can be discussed from a photo. Printhead model, lamp power, ink chemistry, usable width, certification, speed, and adhesion cannot.
- Test the offered machine as a system. Printer, ink, primer, varnish, UV curing, vacuum or media transport, RIP, profile, extraction, and operator routine affect the same finished job.
- Compare sellable output, not carriage speed. Include loading, profiling, cleaning, curing, unloading, rejected work, and changeovers.
- Use a written factory acceptance test. Put the artwork, substrates, test length, pass criteria, records, and remedy for a failed test into the order.
- Price downtime before choosing the cheapest quote. Training, spare parts, response time, diagnostics, consumables, freight, and local technical coverage shape the real cost.
What Is a UV Printer Machine Factory?
A UV printer machine factory builds or integrates digital printing equipment that uses ultraviolet energy to cure compatible ink during the printing process. Depending on the platform, the machine may print directly onto rigid sheets, flexible roll media, objects, or a transfer film used in a separate application process. White ink, clear varnish, primer, rotary fixtures, vacuum beds, roll handling, static control, and texture modes may be available, but none should be assumed from the words UV printer alone.
The word factory also needs a careful definition. One company may design frames, build electrical cabinets, integrate motion and fluid systems, develop firmware, calibrate machines, and maintain a controlled bill of materials. Another may buy a stable platform and add valuable application engineering, profiles, fixtures, testing, training, and service. A third may only resell equipment. Ownership of a large building is not the deciding factor. The useful questions are who controls the configuration, who can reproduce the approved result, and who takes responsibility when a field problem crosses mechanics, electronics, ink, curing, software, and material preparation.
A capable integrator can be a better partner than a weak manufacturer. A local distributor can be worth its margin when it keeps parts nearby and sends a trained technician. Map the responsibility chain rather than rejecting a supplier by label. Your quote, contract, warranty, and support route should identify the party that can diagnose and correct machine-level faults.
First Clarify Which UV Printing Process You Need
Many poor quotations begin because the buyer and supplier use the same phrase for different equipment. Ask each candidate to state the print process in plain language and show the entire workflow from file to finished product.
| Platform | Typical work | Questions that decide fit |
|---|---|---|
| UV flatbed printer | Rigid boards, panels, sheets, promotional items, and suitable objects | Maximum media size and thickness, vacuum zones, head clearance, fixture needs, loading method, and edge-to-edge risk |
| Roll-to-roll UV printer | Flexible films, banners, wall coverings, backlit media, and other supported rolls | Usable roll width and weight, tension, tracking, take-up, flexible ink behavior, and curing at the intended speed |
| Hybrid UV printer | Both suitable rigid sheets and flexible media | How changeover works, how flat material is supported, whether either mode involves a productivity compromise, and the footprint of tables or feeders |
| UV DTF system | Printed adhesive transfers applied to compatible hard surfaces | Film A and B compatibility, lamination, white and varnish layers, adhesive behavior, storage, application method, and final durability |
| Desktop or small-format UV printer | Short runs, samples, personalization, and small objects | Fixture repeatability, object height, maintenance during idle periods, ventilation, operator access, and local service |
| Cylindrical or rotary UV setup | Bottles, tumblers, tubes, and other round objects within the supported geometry | Diameter and length range, taper handling, seam control, chuck or roller method, surface preparation, and fixture setup time |
Do not accept a platform simply because it can physically carry the material. Ink flexibility, surface energy, primer, pretreatment, curing dose, object geometry, abrasion, outdoor exposure, food-contact restrictions, and the customer's finishing process may determine whether the print is commercially usable. The factory should name its assumptions and recommend a test, not promise that one ink "prints on everything."
What the Supplied Machine Photos Show, and What They Do Not
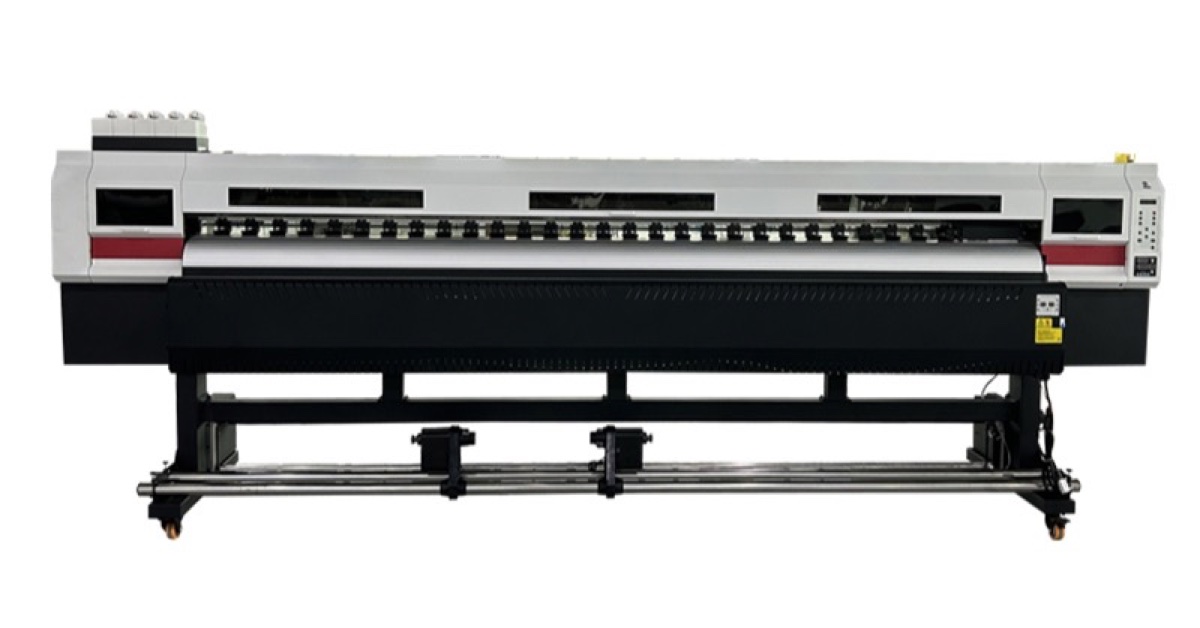
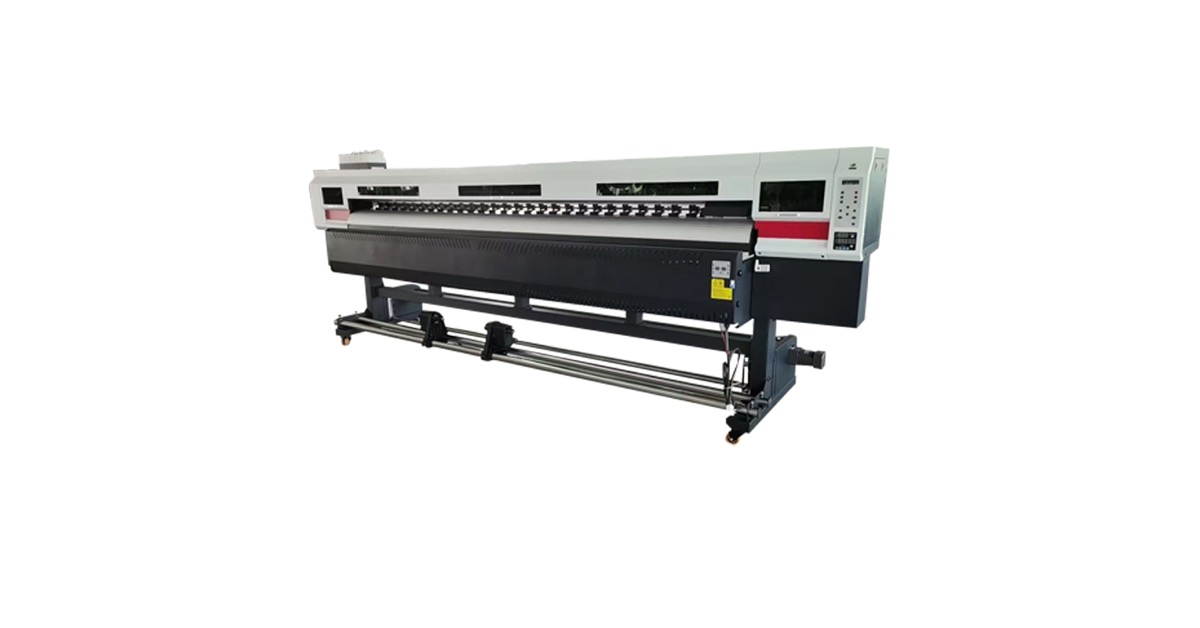
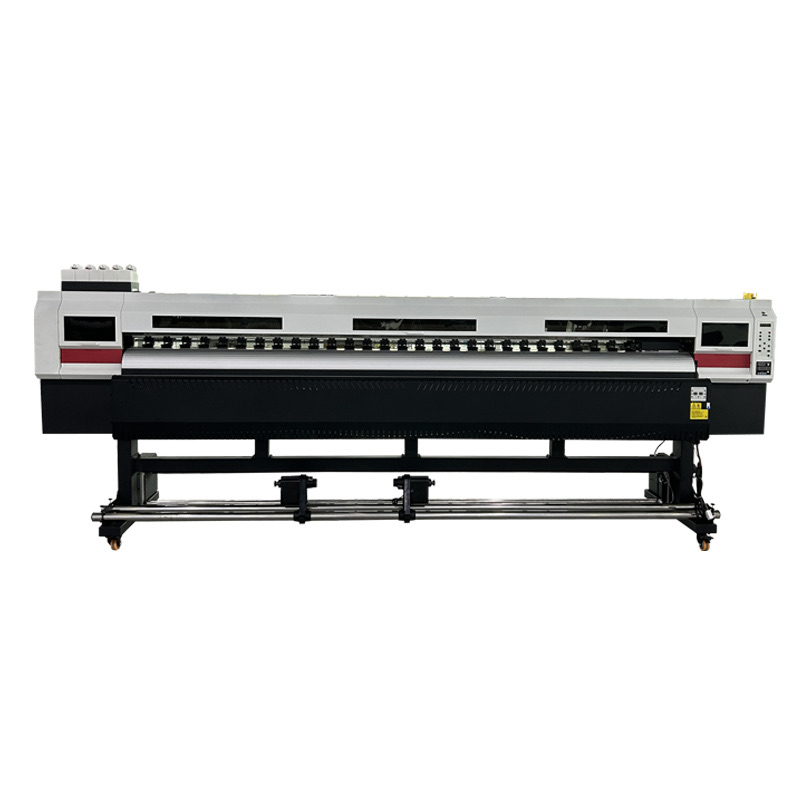
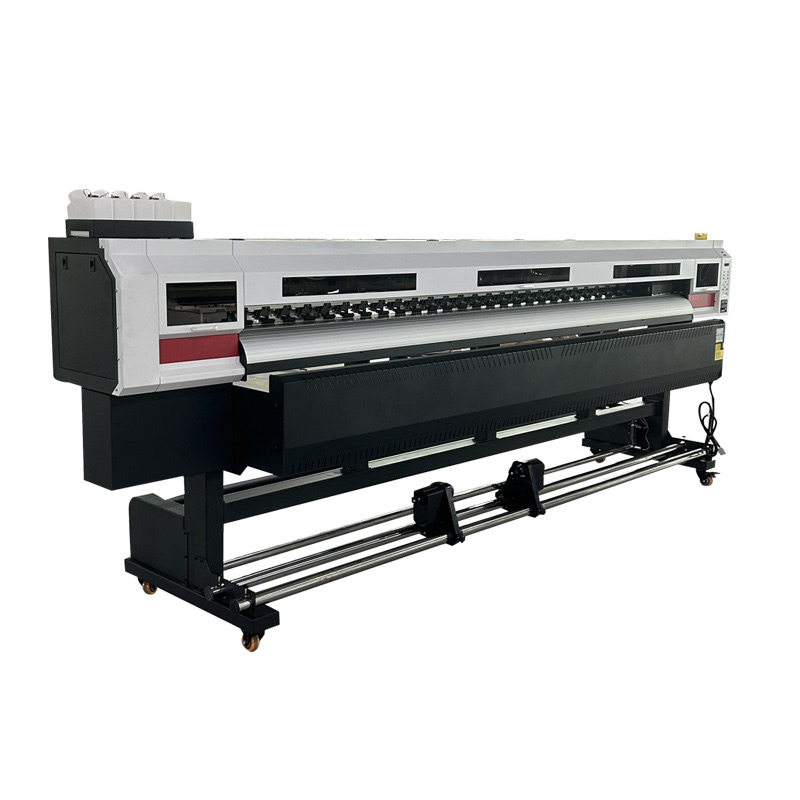
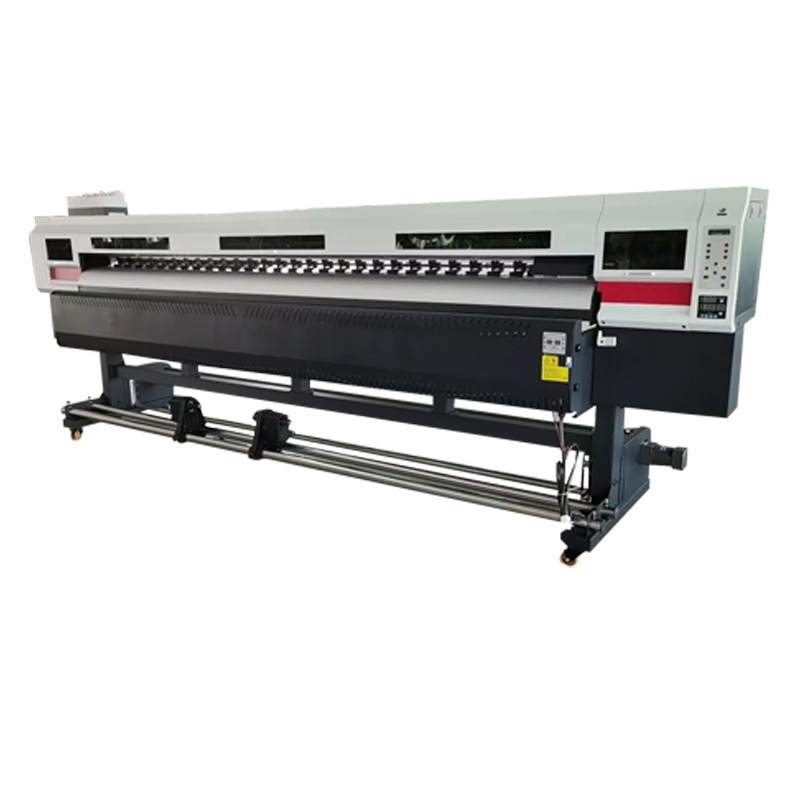
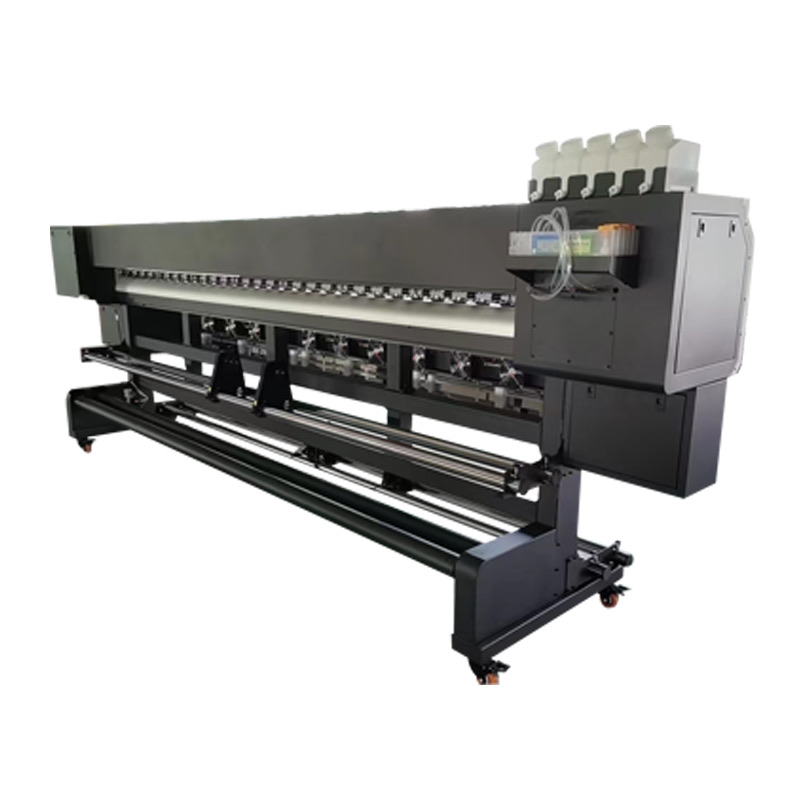
The supplied photographs show several wide-format machine bodies on wheeled stands. Visible features include long carriages, front media or support assemblies, operator controls, external ink containers on some units, and service access from different sides. Those observations are useful when planning floor space, discussing roll loading, locating controls, and asking how an operator reaches routine service points.
There is also a limit. A photograph cannot confirm that a machine is UV rather than another wide-format inkjet type. It cannot verify the exact printhead arrangement, working width, color channels, lamp wavelength or dose, ink brand, electrical rating, RIP license, production speed, nozzle condition, curing result, fire or electrical safety, or compliance documents. It cannot show how the pictured unit differs from the unit on a future invoice. Each of those points needs model-specific evidence.
Write a Requirement Sheet Before You Ask for a Price
A useful request for quotation fits on a few pages and begins with jobs, not adjectives. "High quality," "fast," and "industrial" give a salesperson room to choose the easiest interpretation. A list of substrates, finished dimensions, daily demand, and acceptance tests creates a narrower engineering problem.
Include the following in the brief:
- Primary products, substrates, brands, thicknesses, surface condition, colors, and supplier data sheets
- Minimum and maximum printable size, object height, roll width, roll weight, or sheet weight
- Representative artwork, including small type, fine lines, gradients, neutral colors, large solids, white ink, and varnish if required
- Required viewing distance, color tolerance, texture, gloss, opacity, edge quality, and adhesion
- Average daily sellable area or units, peak demand, shifts, job mix, and expected changeovers
- Indoor or outdoor exposure, abrasion, cleaning chemicals, bending, forming, lamination, cutting, routing, or other finishing
- Room dimensions, doors, floor loading, temperature, humidity, cleanliness, ventilation, and operator count
- Available voltage, frequency, circuits, grounding, compressed air, extraction, network, and computer environment
- Destination country, delivery address, unloading equipment, installation limits, and local language
- OEM branding, manuals, packaging, dealer training, spare parts, warranty, and response-time expectations
Send the same brief to every candidate. Require each factory to list its assumptions, exclusions, and recommended configuration next to the price. If one quote excludes the RIP, vacuum pump, chiller, extraction, tables, starter ink, installation, or critical spares, the total may look attractive only because the comparison is incomplete.
12 Checks Before Choosing a UV Printer Manufacturer
1. Identify Who Controls the Machine Configuration
Ask for the legal company name on the quote, the facility responsible for assembly and calibration, and the team responsible for support. During a live tour, move from incoming components to assembly, calibration, running equipment, quality records, and packing. Ask an unplanned but reasonable question about the unit in view. A polished montage can introduce a company; it cannot replace a live audit.
Request a controlled configuration sheet. It should identify the machine model, printhead family and quantity, board and controller versions, ink channels, curing system, pumps, filters, encoders, motion components, vacuum or feed system, software, voltage, and included accessories. Not every part number must be public before a commercial relationship exists, but the supplier should be able to lock the parts that affect fit, performance, maintenance, and spares.
2. Make the Factory Prove the Actual UV Workflow
Watch the offered machine start, print, cure, and finish your job. Have the technician point out the ink tanks, filters, negative-pressure or delivery components, carriage, UV lamps, shielding, cooling, vacuum or media system, and extraction assumptions. Ask what the operator checks at the beginning and end of a shift.
Do not use a photograph of a lamp or a UV icon as evidence. Record the ink set, print mode, pass setting, lamp setting, carriage direction, material, pretreatment, ambient conditions, and elapsed time. A sample without its process record is difficult to reproduce later.
3. Test Your Real Substrates, Including Difficult Ones
Send material from the same source and finish you plan to buy. "Acrylic," "glass," "metal," and "plastic" describe broad families, not one printable surface. Coatings, plasticizers, release agents, protective films, texture, oxidation, recycled content, and batch variation can change wetting and adhesion.
Clean and prepare the material using a written method. If primer is used, document its identity, application, drying time, coverage, storage, and safety data. Print at least three locations or pieces, allow any required conditioning time, then perform the tests that match real use: cross-hatch or tape comparison, scratch, bend, rub, chemical wipe, water exposure, outdoor aging, lamination, cutting, routing, or forming. Use a qualified laboratory when a standard or regulated claim matters. A salesperson's thumbnail scratch is not a durability specification.
4. Lock the Printhead, Color, White, and Varnish Configuration
The printhead name is not a complete machine specification. Ask how many heads are used, how channels are assigned, which resolutions and passes are supported, and whether quoted speeds use color only or include white and varnish. Confirm which modes are available in the delivered RIP and profiles.
White and varnish can increase application range, but they also add circulation, cleaning, curing, profiling, and maintenance demands. Run jobs with the layer order you will actually sell: color over white, white behind color, varnish as a spot layer, multiple varnish passes, or texture if offered. Inspect registration at the left, center, and right of the working area. Ask how changes in head height or bidirectional calibration affect layer alignment.
5. Trace the White-Ink Path and Idle Routine
White pigment settles. A useful factory explanation follows the ink from tank agitation or circulation through filters, tubes, pressure control, dampers, heads, cap, wiper, and waste. Ask what circulates continuously, what runs on a timer, and what depends on the operator. Then request three procedures: end of shift, weekly maintenance, and long idle storage.
Have the factory demonstrate a cold start after a realistic idle period. Record the initial nozzle check, cleaning steps, ink used, time to ready state, and final nozzle check. Claims such as "no maintenance" or "never clogs" skip ink chemistry, room conditions, operator discipline, cap alignment, wiper condition, and idle duration.
6. Inspect Media Control, Vacuum, Fixtures, and Head Protection
For a flatbed, test the vacuum with both large sheets and small pieces. Check zones, leakage, warped stock, masking effort, and whether a thin or light object can move. For a roll machine, test loading, tension, tracking, edge sensors, pinch pressure, dancer or buffer behavior, take-up, and a long job across much of the usable width. For objects, examine fixture repeatability and the time required to change products.
Head strikes are expensive. Review carriage clearance, height sensing, anti-collision measures, object detection, static control, edge curl, debris control, and operator visibility. Ask a technician to show how a common service item is reached. An inexpensive damper, sensor, cap, wiper, or lamp component becomes costly when access requires long disassembly and calibration.
7. Verify UV Curing, Cooling, Shielding, and Ventilation
Curing is more than switching on a lamp. The finished ink depends on the ink formulation, lamp output, distance, speed, pass strategy, temperature, material, and environmental conditions. Ask where lamp output is set, how cooling is monitored, which parts have expected service lives, and how the factory checks curing consistency across the working width.
Review light shielding, interlocks, warning labels, emergency stops, heat management, ozone or emission assumptions where applicable, and service procedures. Obtain the ink and primer safety data sheets before site design. In the United States, an employer's chemical program may need to address OSHA's Hazard Communication Standard. Local requirements, actual chemicals, ventilation design, and operator exposure still require competent site review.
Do not turn "UV cured" into a blanket statement that the print is harmless, food safe, skin safe, outdoor rated, or fully cured for every application. Those claims need defined materials, test methods, exposure conditions, and applicable regulatory evidence.
8. Open the RIP, License, and Color Workflow
Have the operator open the RIP and its license information. Record the exact product and version, license owner, computer requirements, supported operating system, backup and restore process, update policy, and any recurring fees. Test nesting, spot colors, white generation, varnish layers, repeats, tiling, variable data, and the actual file formats used by your prepress team.
Ask how profiles are named, created, approved, and backed up. A profile should be tied to a printer configuration, ink set, material, print mode, resolution, pass count, lamp strategy, and quality target. The International Color Consortium profile library provides authoritative background and profile resources; the supplier should explain how its own workflow uses them. A promise of "vivid color" is not a repeatable color system.
9. Measure Sellable Capacity Instead of Advertised Speed
Headline speed often represents carriage motion under a favorable mode. It may exclude white, varnish, loading, material preparation, profiling, cleaning, unloading, finishing, and rejected work. Build a witnessed capacity estimate from your jobs.
Sellable output per shift = witnessed good output per production hour x scheduled hours x realistic utilization x first-pass yield.
Measure the ready-file-to-finished-job time. Include routine nozzle checks, cleaning, changeovers, material loading, fixture setup, masking vacuum zones, RIP processing, curing, unloading, and inspection. Record rejected area or pieces. Run at least one short mixed job and one longer repeated job. If the machine will work two shifts, include a handover and restart. The second shift often exposes heat drift, ink management, maintenance ownership, and operator inconsistency that a short demo misses.
10. Review Assembly Quality and Machine-Level Traceability
Look past the exterior panels. Inspect cable labels, connectors, grounding provisions, tubing support, leak control, fasteners, fans, filters, access to moving parts, guards, cabinet cleanliness, and consistency across more than one unit. Ask how rail alignment, carriage movement, feed calibration, vacuum, lamp function, sensors, emergency controls, and continuous printing are checked.
The final evidence should belong to your serial number. Useful records include the approved configuration, incoming exceptions, calibration results, starting and ending nozzle checks, test artwork, substrate and ink details, continuous-run log, safety checks, accessory checklist, firmware and software versions, cosmetic inspection, packing photos, and final sign-off. A generic quality certificate does not show what happened to one machine.
11. Check Electrical, Documentation, and Destination Requirements
Put destination voltage and frequency into the first request, not the last email. Obtain connected-load details for the printer and every required accessory. Ask about peak or starting loads, plug or hard-wire connection, grounding, circuit protection, cooling, compressor, vacuum, extraction, tables, and computers. Have a qualified local professional design and approve the installation.
Do not treat a compliance logo on a label as proof. Match each document to the legal manufacturer, exact model and configuration, standard, issuing or testing organization, report number, and validity. European buyers can begin with the European Commission's CE marking guidance, but the supplier and importer still need to determine which requirements apply. Other destinations have different electrical, radio, chemical, workplace, labeling, and import rules.
Useful documentation includes installation drawings, site checklist, quick start, operator manual, maintenance schedule, fluid diagram, wiring diagram, parts catalog, error guide, calibration procedures, RIP backup, profile archive, safety data sheets, and a version record tied to the shipped unit. Ask to see the manuals before the balance payment, when missing pages can still be fixed.
12. Test Training, Support, Spares, Warranty, and Change Control
Training should resemble a working shift. Let the future operator inspect the machine, start it, read a nozzle check, prepare a substrate, load media or a fixture, set the file, run white and varnish if needed, inspect the result, perform routine cleaning, shut down, and respond to a planted minor fault. Decide who attends, which language is used, whether sessions are recorded, and how follow-up questions are handled.
Contact the support channel before ordering. Send a technical question and judge whether the reply is timely, specific, and safe. Ask how logs, photos, videos, remote access, and replacement decisions are managed. Clarify time-zone coverage and the route for an urgent production stop.
Build the spare-parts kit from downtime. For each likely wear or failure item, record the part number, replacement trigger, shelf life, price, stock location, courier lead time, tools, instructions, and calibration after replacement. Read the warranty line by line. It should define the covered unit, duration, excluded consumables, diagnosis process, evidence required, parts and shipping costs, labor, unauthorized ink or modifications, and the effect of component changes in later production.
A Practical Factory Acceptance Test Before Shipment
Write the factory acceptance test, or FAT, while negotiating the order. Attach the files and name the materials. State the test modes, duration, records, pass criteria, and what happens after a miss. The supplier then knows the finish line before building, while the buyer avoids inventing new demands on inspection day.
- Identify the unit. Record model, serial number, configuration, ink channels, voltage, firmware, RIP license, accessories, and consumable batches.
- Inspect the starting condition. Review assembly, panels, guards, cables, tubes, labels, fasteners, filters, lamps, emergency stops, grounding provisions, and signs of leaks or damage.
- Record the cold-start nozzle check. Note room conditions, idle duration, preparation steps, cleaning cycles, time, and ink used.
- Prepare materials under a written method. Record cleaning, pretreatment, primer, fixture, vacuum masking, and protective-film removal.
- Print buyer-supplied targets. Include tiny positive and reversed type, fine lines, gradients, neutrals, saturated colors, broad coverage, left-center-right marks, white, varnish, and repeated elements.
- Run a meaningful production job. Use enough time, length, sheets, or objects to expose feeding, curing, heat, alignment, operator intervention, and repeatability.
- Measure output. Record ready-file-to-finished time, good area or pieces, waste, cleaning, pauses, changeovers, rejected work, and first-pass yield.
- Inspect print and cure. Compare color, detail, banding, grain, opacity, gloss, texture, registration, edge quality, surface condition, odor, tack, and damage to the substrate.
- Test the application. Perform agreed adhesion, scratch, rub, bend, water, chemical, outdoor, lamination, cutting, or other tests after the defined conditioning period.
- Repeat critical checks. Print the nozzle check again, repeat measurements, and compare samples from the start, middle, and end.
- Demonstrate maintenance and recovery. Complete cleaning, media change, fixture change, profile restore, one common part replacement, and an agreed fault-recovery exercise.
- Close the records. Keep approved samples, photos, videos, logs, settings, inspection sheet, accessory list, manuals, spare-parts list, and a signed disposition of every exception.
A failed check does not always mean rejecting the machine. It does mean recording the cause, correction, retest, responsible person, and result. Do not let "adjusted" replace evidence. If the approved configuration changes, repeat the affected tests.
How to Calculate the Real Cost of a UV Printer
Purchase price is visible because it appears on one line. Ownership cost is scattered across invoices, operator time, waste, maintenance, and lost production. Put the following items into the same model for every candidate:
- Machine, tables, fixtures, rotary unit, vacuum, chiller, extraction, computer, RIP, and initial profiles
- Freight, insurance, duties, customs fees, inland delivery, unloading, site preparation, installation, and travel
- Ink, white ink, varnish, primer, cleaning fluid, wipes, filters, waste containers, and test material
- Operator labor for preparation, loading, printing, unloading, cleaning, inspection, rework, and changeover
- Preventive maintenance, lamps or curing components, caps, wipers, dampers, pumps, filters, sensors, heads, and service labor
- Color profiling, artwork preparation, software fees, backups, and training
- Rejected work, startup waste, idle cleaning, expired consumables, and environmental controls
- Downtime, expedited freight, outsourced production, missed delivery, and customer recovery
A simple comparison uses cost per sellable square meter or cost per accepted piece, not cost per printed square meter. Use measured ink and labor from the FAT or a pilot. Add conservative maintenance and downtime assumptions. Then test how the result changes if white coverage doubles, yield falls, a head is replaced, or a critical part takes a week to arrive. Sensitivity matters more than a perfectly neat spreadsheet.
Factory, Integrator, Distributor, or Marketplace Seller?
| Supplier type | Potential strength | Risk to verify |
|---|---|---|
| Manufacturer or deep integrator | Configuration control, diagnostics, customization, machine records | Local service, language, response time, export experience, and parts logistics |
| Specialist distributor | Installation, nearby parts, on-site technicians, application knowledge | Access to upstream engineering, configuration stability, and warranty authority |
| General trading company | Broad sourcing, consolidation, export coordination | Technical depth, changing sources, slower diagnosis, and weak machine traceability |
| Marketplace seller | Fast comparison, visible pricing, buyer protection on some transactions | Identity of the actual builder, specifications, service path, parts, and long-term support |
There is no automatic winner. A distributor with a stocked printhead, trained engineer, and two-hour drive can create more uptime than a direct factory an ocean away. A strong factory can make customization and repeat orders far more predictable. Price the value and the risk of each route instead of assuming that "direct" always means cheaper.
OEM and ODM UV Printer Projects
An OEM UV printer program may include cabinet colors, logo, model name, panel language, manuals, packaging, startup kit, spare-parts kit, profiles, dealer materials, and regional voltage options. More ambitious ODM work may change the structure, fixtures, media path, ink channels, boards, firmware, lamps, or software.
Begin with a validated base machine. Separate cosmetic changes from engineering changes. Every modification that can affect motion, fluids, curing, cooling, safety, software, output, service, or regulatory scope needs a documented review and appropriate retesting. Lock artwork ownership, approval samples, minimum order, configuration, revision control, documentation language, warranty responsibility, support escalation, end-of-life notice, and parts availability.
For repeat orders, ask the factory to compare each batch against the approved reference. A component substitution may be reasonable when a part becomes unavailable, but "equivalent" should trigger written notice, engineering rationale, version updates, and tests tied to the affected function.
A 100-Point UV Printer Factory Scorecard
| Area | Points | Evidence to score |
|---|---|---|
| Application fit and requirement response | 15 | Written assumptions, material review, correct platform, clear exclusions |
| Witnessed print, curing, and application tests | 20 | Your files and materials, repeatable settings, approved samples, meaningful run |
| Configuration control and traceability | 10 | Locked bill of materials, serial records, versions, change notification |
| Mechanical, fluid, electrical, and curing design | 10 | Access, protection, labels, cooling, shielding, maintainability, safety review |
| Quality control and FAT evidence | 10 | Nozzle checks, calibration, logs, inspection sheet, packing record |
| Color, RIP, profiles, and data workflow | 8 | Licensed software, working functions, backups, named profiles, restore test |
| Training and technical documentation | 7 | Operator-led training, manuals for this unit, fault and maintenance procedures |
| Support, warranty, and local capability | 8 | Tested channel, response route, clear coverage, field or distributor plan |
| Spare parts and lifecycle support | 5 | Part numbers, stock, prices, lead times, replacement instructions, change control |
| Total cost and commercial clarity | 5 | Itemized scope, landed cost, measured consumables, payment and delivery terms |
| Destination compliance readiness | 2 | Model-matched documents and a credible plan for the target market |
Set mandatory gates as well as a score. A supplier should not win with a high total if it fails a required application test, cannot identify the contracting company, changes the quoted configuration, lacks a legitimate software license, or refuses machine-level acceptance records. Keep price outside the technical scoring meeting until the first comparison is complete. That small discipline prevents a tempting number from changing how people interpret weak evidence.
Common Red Flags
- The supplier says one machine is suitable for every material but will not test your substrate.
- Maximum speed is quoted without mode, pass count, resolution, white or varnish, material, curing setting, and quality criteria.
- The photographed machine, quotation, invoice, and acceptance unit do not share a traceable configuration.
- A perfect sample appears, but the supplier will not run the buyer's awkward artwork or a longer job.
- Ink adhesion is demonstrated immediately, without a defined conditioning period or test method.
- White-ink maintenance is described as unnecessary.
- RIP ownership, version, license recovery, profiles, or recurring fees are unclear.
- Compliance is reduced to a logo, with no model-matched report or responsible legal company.
- The warranty promises support but does not define parts, freight, labor, exclusions, evidence, or response path.
- The spare-parts kit contains many cheap items but omits the parts that would stop production.
- The factory discourages keeping samples, videos, settings, or machine-level inspection records.
- The balance is due before the agreed FAT is complete.
How to Request a Comparable Quotation
A short, specific request receives better engineering attention than a message asking for "best price." Send this information:
- Products and applications, with photographs of the finished result
- Actual substrate samples and supplier data, including surface finish and thickness
- Minimum and maximum job size, object geometry, roll details, or sheet details
- Artwork that represents easy, normal, and difficult production
- Required color, white, varnish, texture, adhesion, durability, and finishing
- Average and peak sellable output, shift plan, job mix, and changeovers
- Facility, power, environment, extraction, access, and operator constraints
- Destination, delivery term, unloading, installation, training, and support language
- Required FAT, records, warranty, critical spares, and acceptance timing
- OEM or ODM scope, forecast, revision control, and repeat-order expectations
Invite the factory to challenge the brief. A competent engineer may recommend a different width, platform, ink set, fixture strategy, or automation level. Ask for the trade-off in output, labor, maintenance, application risk, floor space, and cost. Then verify that recommendation with the same files and materials.
Frequently Asked Questions
How do I verify a real UV printer machine factory?
Arrange a live tour that moves through parts storage, assembly, calibration, running machines, quality records, and packing. Match the legal company across the quotation, payment details, business documents, certificates, and shipment. Then verify the exact machine through its serial number, locked configuration, witnessed test, inspection report, and support route. A real facility is only the first layer of verification.
What should I send a UV printer manufacturer for a test?
Send the actual substrates and representative files you plan to produce. Include difficult artwork with tiny type, lines, gradients, neutrals, broad solids, white, varnish, and repeated targets. State the cleaning or pretreatment method, finishing process, conditioning time, and durability tests. Keep the approved samples and the complete settings record.
Is a UV flatbed printer or roll-to-roll UV printer better?
Neither is universally better. Flatbeds are designed around suitable rigid sheets and objects; roll machines manage compatible flexible media. A hybrid may cover both, but changeover, support tables, media handling, footprint, and productivity should be tested. Choose from the jobs and daily workflow, not from the broadest feature list.
Can a UV printer print on any material?
No responsible supplier should promise universal adhesion. Surface coating, energy, contamination, texture, flexibility, primer, ink, curing, and final exposure all matter. Test the exact material batch and finishing process. Use defined methods and qualified laboratories when a regulated or long-term performance claim matters.
How should I compare UV printer speed?
Give each factory the same file, material, print dimensions, mode, pass count, color configuration, white or varnish requirement, cure target, and quality criteria. Measure accepted output from a ready file through inspection, including normal cleaning, loading, changeovers, and rejects. Compare sellable output per production hour, not the fastest number in a brochure.
What matters most in white-ink management?
Look for a controlled path that addresses agitation or circulation, filtration, pressure, dampers, capping, wiping, cleaning, waste, room conditions, and idle periods. Ask for written daily, weekly, and long-idle procedures, then witness a start after realistic downtime. Maintenance claims should be demonstrated with nozzle checks and time records.
What is a reasonable UV printer factory acceptance test?
A reasonable FAT identifies the unit, checks assembly and safety functions, records cold-start nozzle condition, prints buyer files on buyer materials, runs long enough to reveal drift, measures good output and waste, tests curing and the intended application, repeats critical checks, demonstrates maintenance and recovery, and closes every exception with a documented retest.
Which spare parts should be ordered with a UV printer?
Choose parts by downtime and delivery lead time. The list may include filters, caps, wipers, dampers, pumps, sensors, cables, fuses, tubing, lamps or related curing parts, and other model-specific wear items. Lock exact part numbers and obtain replacement instructions. A generic model-family kit is not precise enough.
Does buying directly from a UV printer factory always cost less?
No. Direct supply may reduce markup and improve access to engineering, but a good distributor can provide faster installation, local parts, native-language support, and on-site service. Add freight, duties, installation, training, consumables, maintenance, and realistic downtime to both offers. The lowest invoice can produce the higher operating cost.
Can a UV printer factory provide OEM or private-label machines?
Many factories and integrators can support logos, cabinet colors, labels, manuals, packaging, voltage options, starter kits, profiles, and dealer spares. Engineering changes to heads, electronics, fluids, curing, structure, or software require review and retesting. Start with a validated base machine and use formal revision control for repeat orders.
What information is visible in a UV printer photo?
A photo may show the enclosure, approximate physical format, controls, visible ink containers, access panels, media supports, and operator clearances. It does not prove UV curing, heads, channels, speed, width, ink, profiles, safety, compliance, or output. Use photographs to prepare questions, then verify the quoted machine with documents and witnessed tests.
The Final Decision Comes Down to Reproducible Evidence
The best UV printing machine factory for a particular buyer is the supplier that turns a real workload into a controlled configuration, proves that configuration with the buyer's files and materials, documents the unit it tested, trains the people who will run it, and keeps the machine maintainable after delivery.
Begin with finished jobs. Clarify flatbed, roll, hybrid, object, or transfer workflow. Walk the ink and media paths. Watch curing and cooling. Open the RIP. Measure accepted output. Test adhesion after the correct conditioning period. Review the cabinet, manuals, spares, warranty, and support channel. Put the findings into a written FAT and a cost model. Branding and final price negotiation come after the evidence is on the table.
For a related production-system comparison, read the DTF printer machine factory buyer guide. You can also review the product catalog, check the supplier background on the About Us page, or use the contact page to request a live material test and an itemized quotation.
Editorial note: This guide was reviewed in August 2026. It is a procurement and verification framework. It does not replace model-specific manuals, safety data sheets, qualified electrical or ventilation design, laboratory testing, legal advice, import guidance, or independent compliance assessment. Machine photographs are discussed only for visible features; no hidden specification or certification has been inferred from them.